Git and GitHub
Table of contents
- GitHub terminology overview
- Creating a project repository
- Cloning the repository
- Adding, editing and committing files
- Pushing commits to GitHub
- TL;DR
- Pulling updates from the server
- Further reading
In this tutorial, you’ll create your own repository on GitHub, make the repository available on your computer, edit and create some files, and commit and push the edited files to GitHub.
GitHub terminology overview
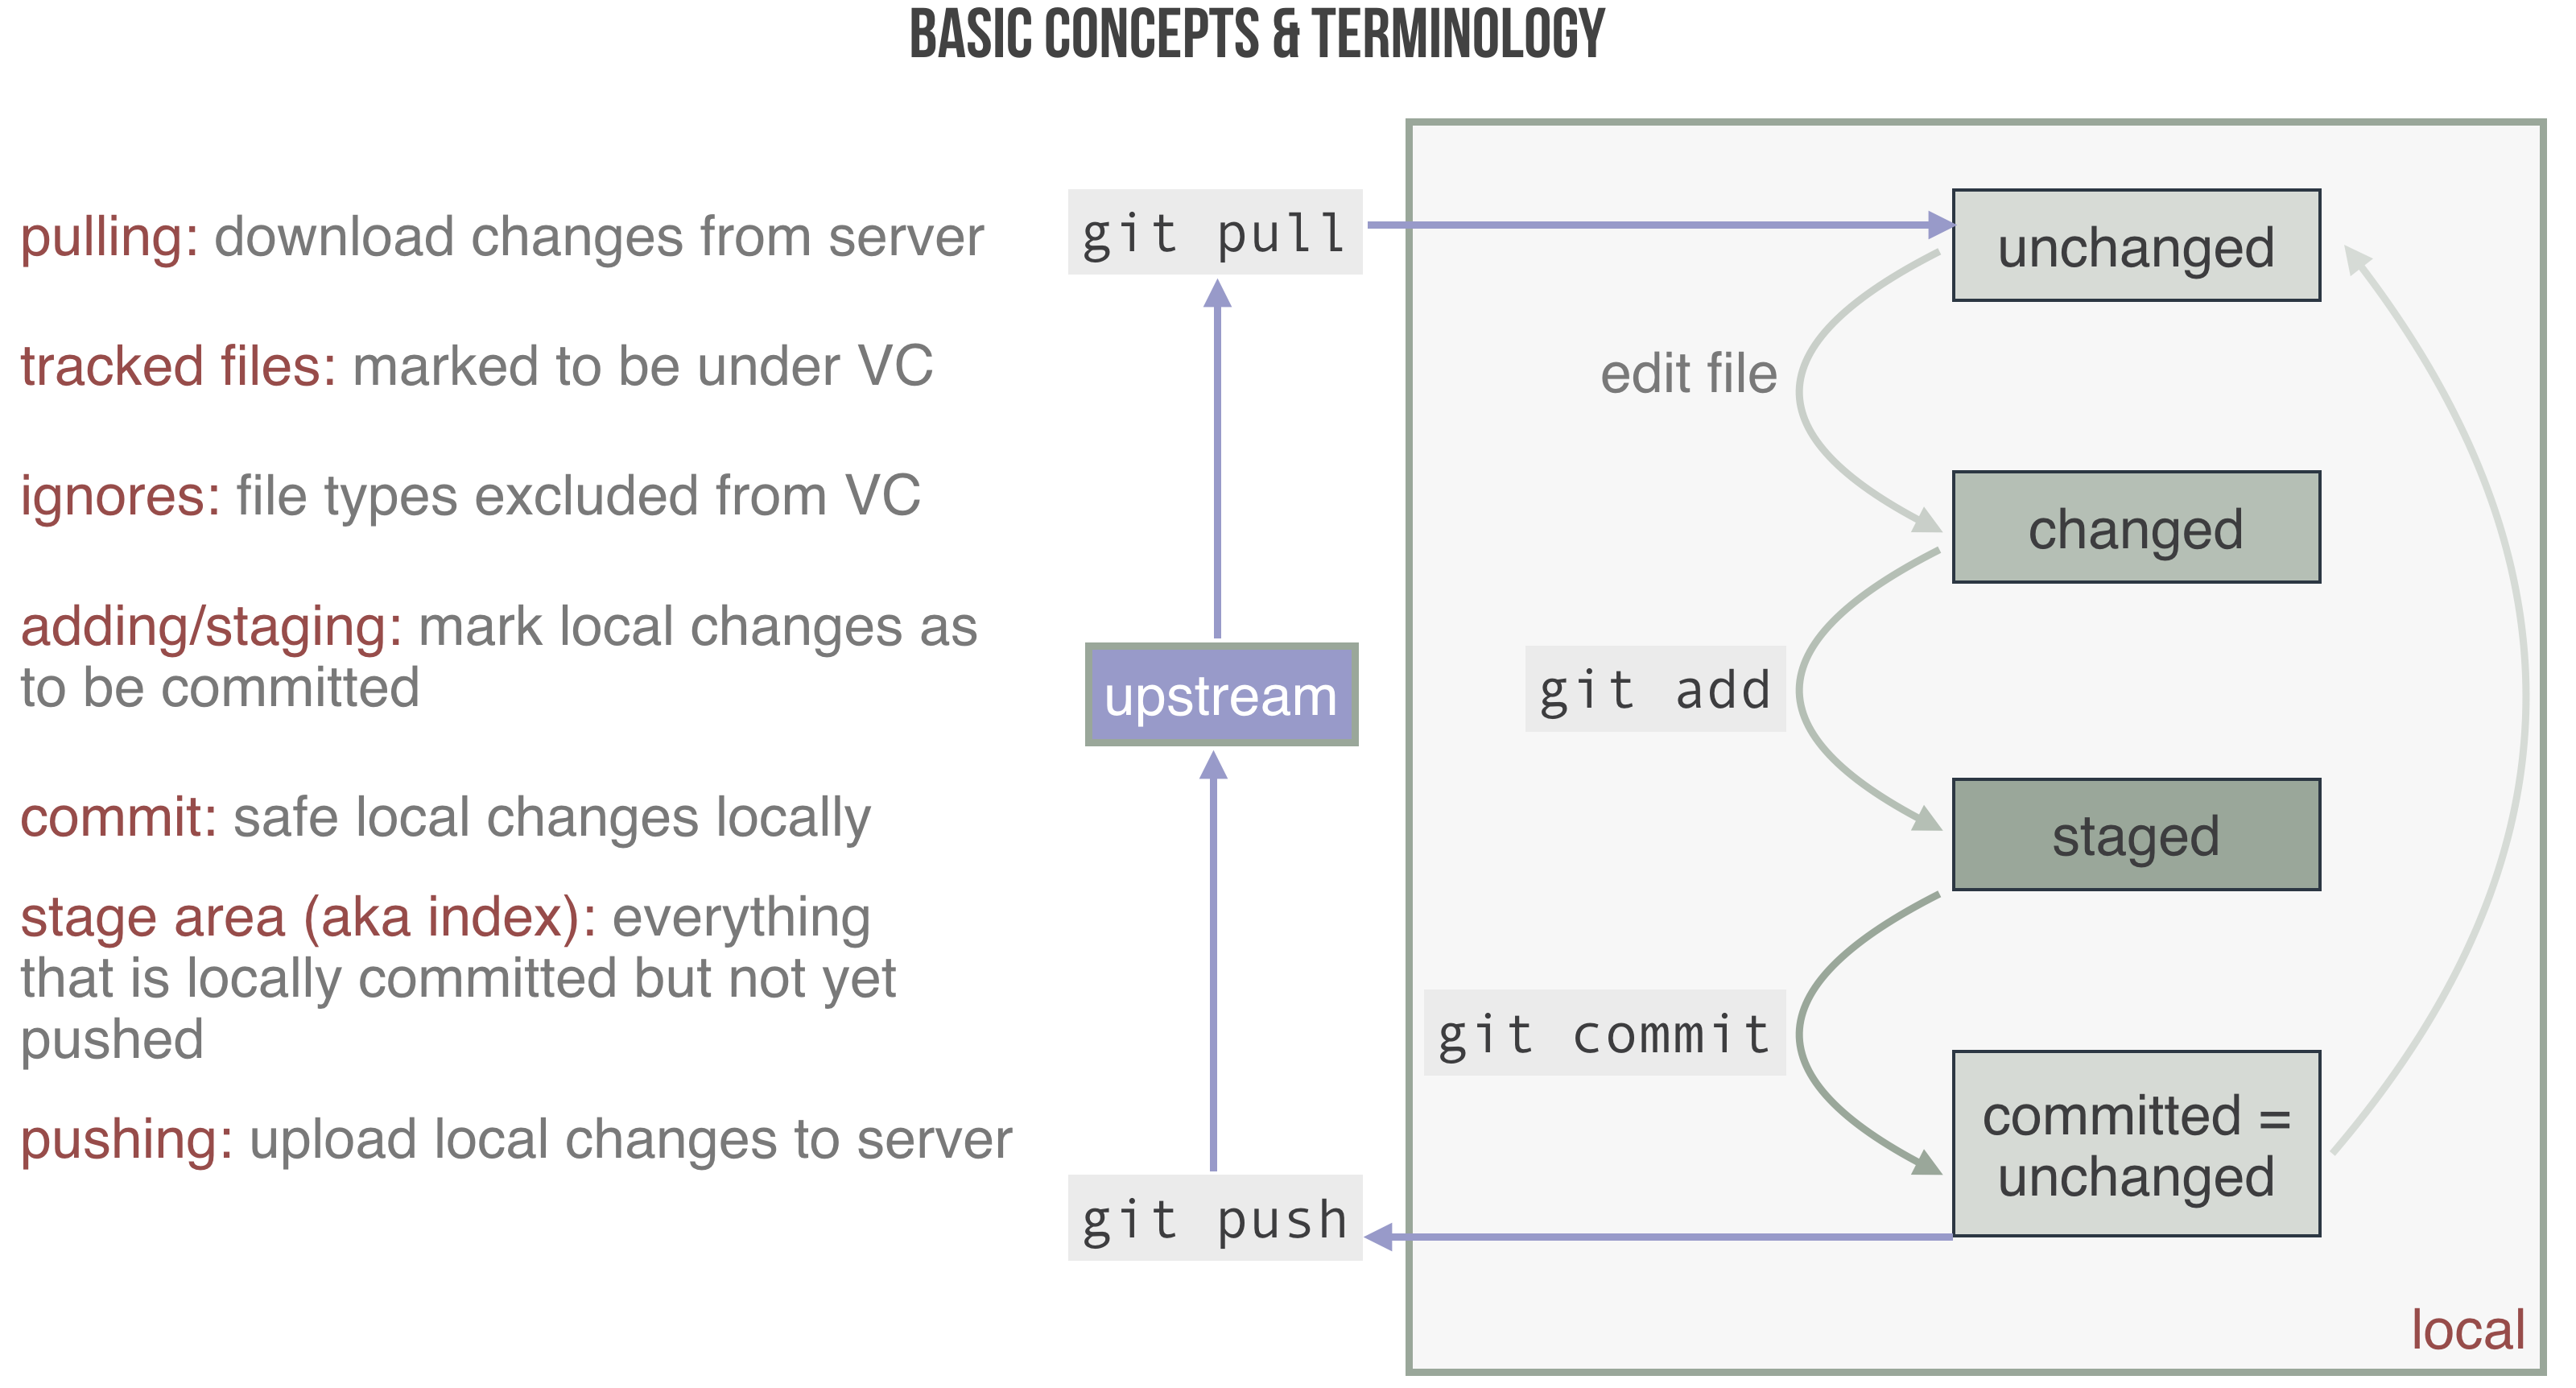
Visualization from Open Science book by Michael Franke.
Creating a project repository
We’ll create a tutorial from a template that already has a basic structure and a basic version of the experiment that you will run as part of this course.
Click the green “Use this template button” to create a new repository from this template.
Give the template a name (e.g.,
my-project) and click “Create repository from template.”
This should redirect you to your newly created repository.
Cloning the repository
In order to edit, add or delete files, you’ll have to create a copy of the repository on your computer (in Git terminology this is referred to as “cloning” a repository).
Create a directory on your computer where you want to store all the files.
On the homepage of your repository (something like
https://github.com/<YOUR-USERNAME>/<YOUR-REPOSITORY-NAME>), click on the green “Code” button.Copy the HTTPS URL to the clipboard.
Open the Terminal (on MacOS/Linux) or the Anaconda Prompt (on Windows).
Change into the directory from step 1 using the
cdcommand. For example, if you have a directory calledlsa-minicoursein your home directory, you can change into it by runningcd lsa-minicourseIf you are using MacOS you can also type
cdinto the Terminal and then drag the directory from Finder into the Terminal window to insert the full pathClone the repository:
git clone https://github.com/<YOUR-USERNAME>/<YOUR-REPOSITORY-NAME>.git(paste the URL from the clipboard)
This should download all the files from the repository into a subdirectory called
<YOUR-REPOSITORY-NAME>.Change into the directory of the cloned repository:
cd <YOUR-REPOSITORY-NAME>List the contents of the repository
On MacOS/Linux:
lsOn Windows:
dirThis should display the names of the folders in the repository and the file README.md
Adding, editing and committing files
Now that you have a local copy of the repository, you can add and edit files with any program as you would do with a regular folder on your computer.
Add a
README.mdfile to theexperimentsdirectory using a text editor. Add a description of the contents of theexperimentdirectory to this file.(This is totally optional, but if you want to format the README file, you can use markdown.)
Edit the
README.mdfile in thedatadirectory using a text editor. Add a description of the contents of thedatadirectory to this file.To see which files have been added or changed in the repository, go back to ther Terminal/Prompt and run:
git statusThis should show that the file
data/README.mdhas been modified and that the fileexperiments/README.mdis untracked, which means it hasn’t been added to the repository yet.To add all the modified and new files to the repository run
git add .If you want to add individual files, you can also run
git addwith one or multiple file paths. For example:git add data/README.md experiments/README.mdwill also add both of these files.
Running
git addstages the files, which means they are ready to be permanently added to the history of the repository.To permanently add the files to the history of the repository, we’ll have to “commit” them:
git commit -m "added and updated README files"This will add all staged files to the history of the repository. The message “added and updated README files” is the commit message which is supposed to provide a summary of all the changes.
Pushing commits to GitHub
Up until this point, all the changes are part of the local copy of the repository. To make them available online on GitHub, you’ll have to push the commit:
git push origin master
This will send all the local changes to the GitHub server. If you go back to your repository on the GitHub website, you should now see all the changes you’ve made.
TL;DR
To commit and push changes in a local repository, run:
git add .
git commit -m "YOUR COMMIT MESSAGE"
git push origin master
Pulling updates from the server
If a collaborator makes changes or you change files in the repository on another computer, you’ll have to download the changes from GitHub using the pull command:
git pull
This will add any commits that you or someone else made on another computer to your local repository.
Further reading
Git and GitHub support much more complex scenarios of collaboration than the basic use cases that we sketched here. To learn more about Git and GitHub, take a look at the following resources: